Tuesday, 30 April 2013

Building a sliding mount for my in car radio - Part 2


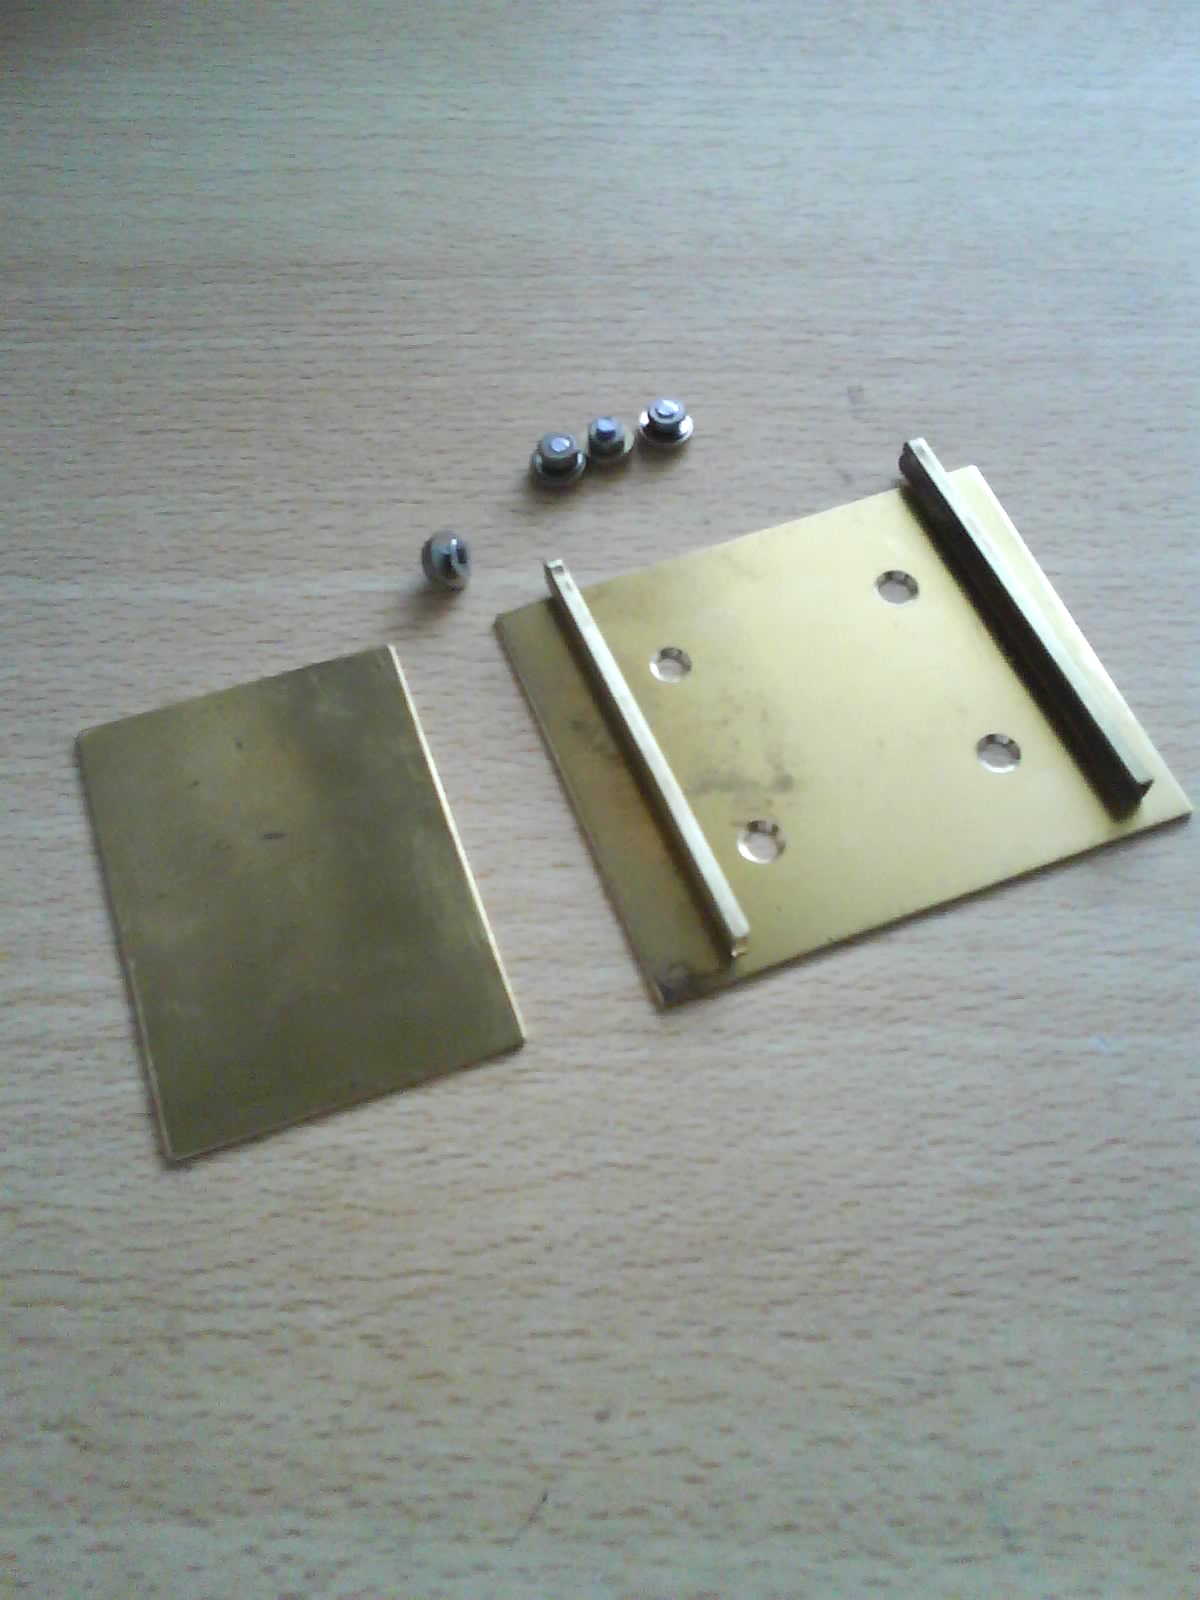
The main part of the bracket has now been drilled and the holes countersunk. I cut down four screws and will be using both flat and crinkle washers. The preformed channels have had one end folded over and silver soldered. The next job is to clean up the brass and position the first channel ready for soldering. I plan to hold the channel in place with some bent paper clips. Hopefully this will do the job without the parts moving about. Once the first one has been soldered in position I’ll arrange the second channel so that the top part of the bracket slides in without binding. After both have been soldered I’ll have the fun of cleaning it all up.

Thursday, 25 April 2013

Building a sliding mount for my in car radio


Now that the weather is getting better, I am looking to fit my mobile radio into my car. I don’t want it to be a permanent fixture as it could be stolen if left in unattended. I have decided on where I want to fit the radio and have devised a bracket design that will allow me to slid the radio in and out. I’ll still have to connect the power and antenna but this will only take a few seconds. I am going to make the brackets out of various pieces of brass soldered together. I have cut out the bits I’ll need and a photograph of these is shown below. My next job is to fabricate the channels so that they are blocked at one end. These will then be soldered onto the larger sheet of brass which I’ll attach to the radio mount. The small sheet of brass will be mounted in the car where the radio bracket will slid over it. When I get some spare time to do the drilling and soldering I’ll post the next set of pictures.

Monday, 4 February 2013

Video of my shortwave radio Christmas present


Here is a short video clip that shows the shortwave radio kit that I built over Christmas. I tried both my vertical and horizontal antennas and both appeared to give similar results. Whilst tuning around the bands (12MHz to 18MHz) I received several foreign stations. Near the end of the video is a short audio clip. Rather annoyingly I was also picking-up some local interference. The signals appeared to be fading so were coming in via the sky wave, which is probably why my different polarized antennas gave a similar signal strength. I will try the radio under different weather conditions and different times of the day to see if the results change. There are several beacons within the receivers range so this would be a handy way of checking propagation.
 

Thursday, 17 January 2013

Yaesu FT-1900


As a diehard Yaesu fan, I couldn’t resist getting one of their mobile transceivers for the car.  Now to spend a few days programming in all the local repeater offsets. With any luck I'll post some more details of this rig in the next few weeks.


Monday, 7 January 2013

Maxitronix short wave radio kit


At work this year I was given a Maxitronix short wave radio from my “secret Santa”. This is an interesting kit designed for anyone over the age of eight. I have my doubts that such a youngster could construct this without the help of an adult. The kit has part number MX-901SW and covers the frequencies from 6 to 8 MHz and 12 to 18 MHz. The kit has been designed so that no soldering is required. The wires from the various components link together by trapping them between spring like connectors. Whereas most of the components are individual items, there is a constructed circuit board that has several wires to connect up. The two coils are pre wound which is useful but I was a little disappointed as I rather like winding these. The instruction manual is well written and the steps are easy to follow. Here are some images of the parts in the box.


The first task is to “screw” the springs into the cardboard board. This board has the circuit diagram printed on one side which makes it easy to see where everything goes. The instructions recommend that you use a pencil placed on the end of the spring to help twist / push the item so that half is exposed either side of the board. This seems to be easy until you try it. The springs refuse to position themselves correctly and tend to distort or unwind. At one point I managed to cut myself on one of these and liberally covered the underside of the board in my blood. It is for this reason that I doubt that an eight year old would have fared any better. My solution to this problem is to first enlarge the holes on the board by inserting the pencil and wiggling it about to increase the size. The springs will then screw into the holes as described with little effort. On the side of the board that is not printed, it is recommended that you write the corresponding number next to the spring. This makes it easier to get the wiring correct first time. Here are some images of the underside of the board with the numbers added and the top side of the board once all the springs have been connected.


The next job is to insert the components in stages as described in the instructions. It is a simple case of bending the leads with a pair of pliers, pushing them through the holes in the board and bending over the legs. By pushing the spring to one side the coils open up and the leg of the component can be slid in and trapped. Some of the springs take several leads so best to place the first ones as low as possible to leave room for the others. It doesn’t take long to fit these but care needs to be taken when fitting some capacitors and the battery leads that they are wired round the right way. One of the coils is fitted to a ferrite rod and the other sits next to it. The wire from these coils is a little long and could easily be trimmed. If you do this, you must remember to remove some of the insulation before trapping the leads in the springs. The pre-constructed circuit board is screwed to the board and its wires easily connected.


 The battery and tuning capacitor are fixed to the plastic chassis that holds the board. I would then recommend that you double check the wiring to ensure everything is connected correctly and the right way round. The transistor has short legs so ensure this is fitted as instructed and all legs securely clamped. Once you are happy with your work, you need to decide which frequency range you want to listen to and connect to correct flying leads. Unravel the antenna and connect the battery and earpiece. Here is an image of the completed radio.


 I was able to construct this in about an hour. Because I was running out of time I wasn’t able to give the radio a full test. I can confirm that the volume was good and when tuning across the bands I was able to pick up some Morse. In the second part of this blog post I will connect the radio to my external antenna and see how it gets on with receiving some beacons around the country. 

If you have any questions about this kit or are having problems with yours, please contact me and I’ll try to help.
 
A copy of the manual in PDF format can be viewed here: http://www.elenco.com/admin_data/pdffiles/MX901SW.pdf


Wednesday, 26 September 2012

My new 2m Power Amplifier

Now that I am using my Wouxun handheld unit in my car, I feel that its 5 watt output is a little on the weak side. Recently I spotted a 2m amplifier on eBay and decided to try a few bids. The device was described as untested but the seller said the lights came on and there was a circuit diagram available on the Internet. I kept my fingers crossed as the minutes ticked away but I eventually won the amplified for just over £30. It soon arrived so I set about making up some new patch leads so I could test it.


This amplifier produces around 30 watts of output from 5 watts in. It also has an adjustable RX amplifier. The unit is made by "Tokyo Hy-Power" and the model number is HL-37Vsx. I first decided to power it up and ensure it didn't do anything strange such as smoke or draw too much current. In its idle state all seemed well. I then connected it to my rig and antenna so I could test the RX amplifier. I found a suitable signal which was a conversation on the local Cambridge repeater. As you will see from the short video below, moving the sliding potentiometer adjusted the signal strength. This RX amplifier can be left at a suitable level or turned off altogether. As I tend to use the Cambridge repeater when mobile, I will probably set this to a reasonable level as it'll be hidden away and not accessible whilst driving.


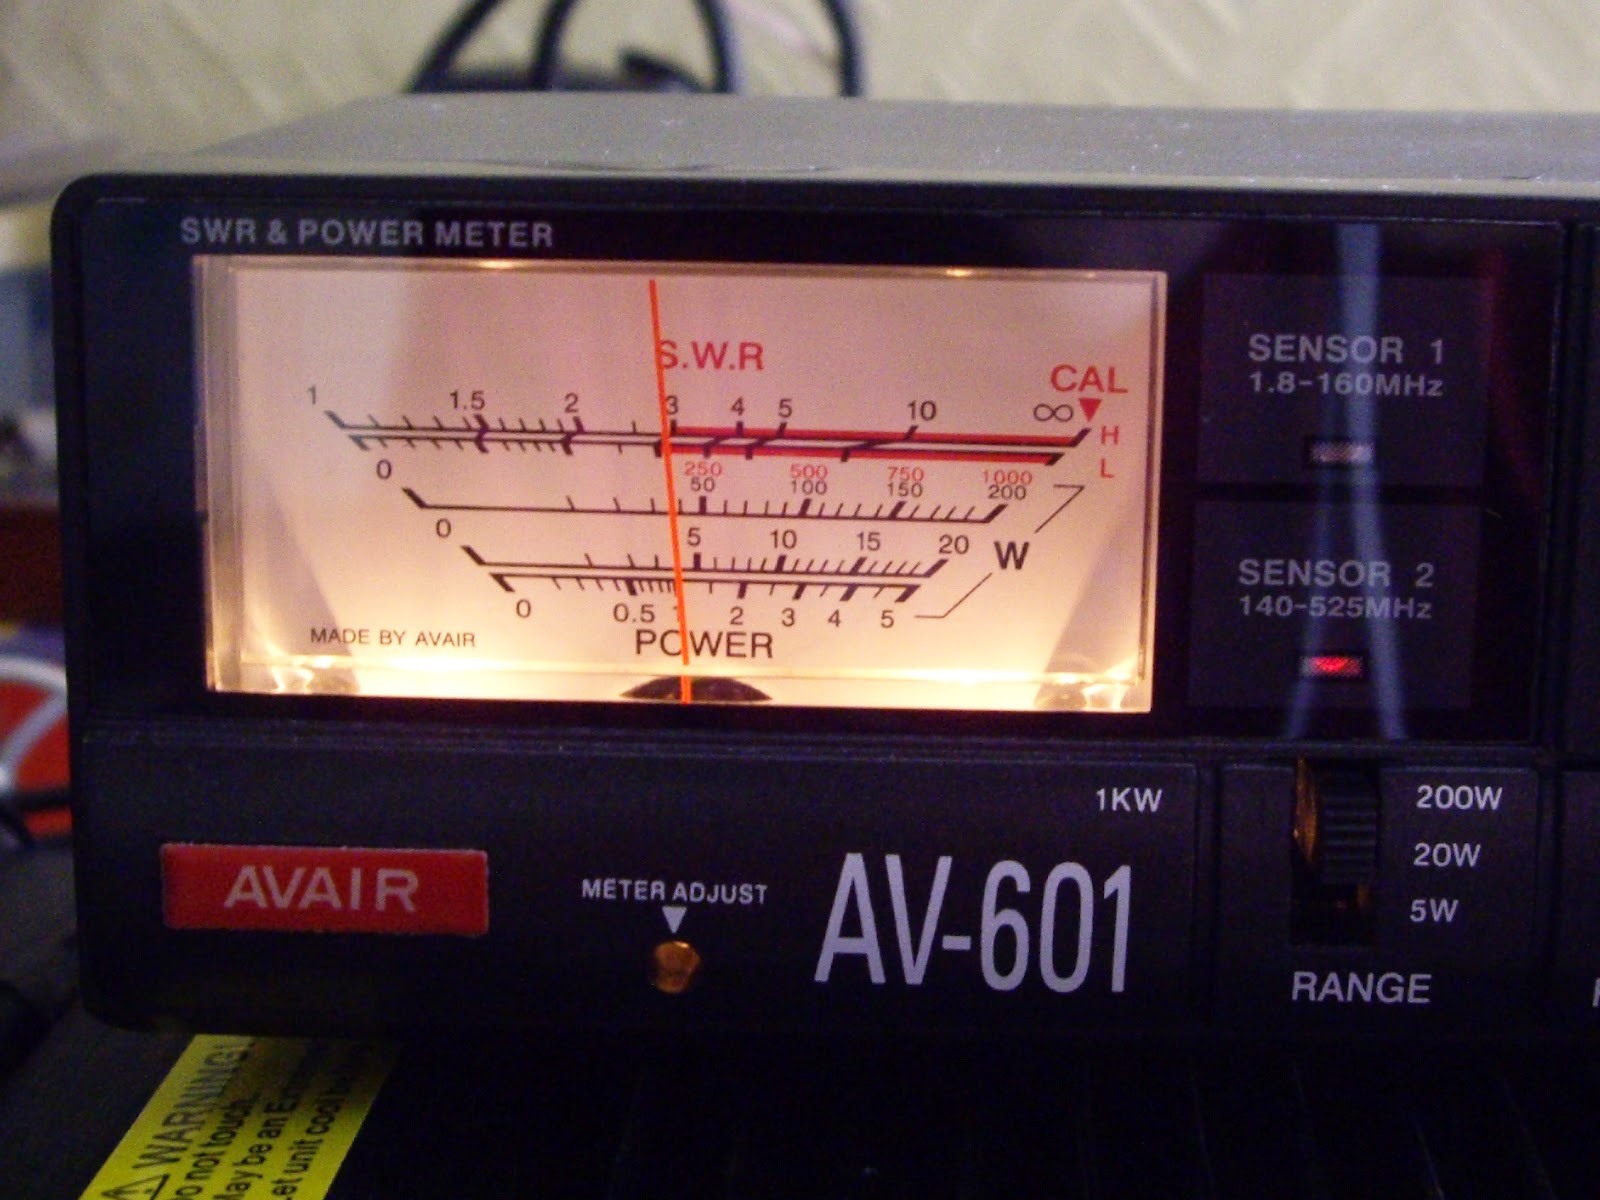
Next on the "todo" list was to check the SWR whilst transmitting 5 watts into a dummy load. I did this with the amplifier switch off and then switched on. With the unit off the SWR was about 1.3:1 and with it on it was just about 1:1.

The final test was to see if the amplifier was living up to its name and actually amplifying. My transmitter was configured to output 5 watts. With the amplifier turned off and my power meter set to 20 watt fsd, the meter showed an output of just over 3 watts of FM.


I then changed my meter to display 200 watts fsd and switched on the amplifier. The meter showed an output of 40 watts of FM.


The manufacture's specification says I can expect an output of around 20 to 35 watts with a maximum input of 5 watts. With my meter showing an output of 40 watts I am happy that this is probably about right, give or take a few watts. At this point my dummy load was getting rather warm so I completed my basic testing. The next test will be to try some on-air contacts to see that the audio isn't being distorted etc. I will then need to buy some additional coax to enable me to set this up in my car. So far this amplifier seems like a good purchase.

Monday, 3 September 2012

Building a new matching transformer


Having a recent antenna failure I decided to rebuild the matching transformer that feeds my end fed wire. This design comes from the “Emergency Amateur Radio Club” based in Honolulu (http://www.earchi.org). This project creates a trifilar wound 9:1 UNUN (unbalanced to unbalanced) toroid matching transformer. This will match the high input impedance of an end fed wire into a range that most antenna tuners can handle. The designer says it should handle 100 watts of power.

The key parts are: 
  • A small plastic box (something that can be made waterproof)
  • A powdered iron toroid (EG T106-2)
  • Three 20 inch pieces of 22 gauge solid insulated copper wire (in three different colours if possible)
  • An RF panel mounted connector (BNC or S0-239)
  • You will also need the relevant screws, nuts and solder tags etc, to fit the package together.
I first drilled the box and fitted the connectors to ensure that everything would fit correctly. 

 
Next job was to wind the toroid. As I didn’t have access to different coloured copper wire, I instead fitted coloured sleeves to the ends of each cut length.
 
 
It is important to keep the wires in the correct order and not cross them as they are wound. They should be appear in the following order (left to right), Green, Black and Red. Wrap these round the toroid 9 times as shown in the picture below. I found that the first few windings were a little loose so I added a couple at the end and unwound the loose ones from the start. That way I still had 9 turns but a much better spread and even tightness. After winding, ensure that the wires on the last turn are in the correct order. If they aren’t then they must have twisted at some point.


It is important to get the next sections correct else you will have to start again with new wire. Holding the toroid as in the above picture, solder the “Left Black” wire to the “Right Red” wire. I found the best way was to first scrape off the insulating coating from both wires where they would touch. Then twist both wires together with a single turn. This will pull both together and make a sound mechanical joint. Solder the two wires and remove the trailing ends. 

Next you need twist the “Left Green” wire and “Right Black” wire together. First clean off the insulation before twisting together. This joint needs to be attached to the centre connection of the RF connector fitted to the box. Before cutting off the excess wire. Place the toroid into the box to see where the cut should be made.

 
The (Left Red) wire should be cleaned and soldered to the connector on the box that the wire antenna will be connected. The remaining (Right Green) wire should be cleaned and soldered to the outer ground connection of the RF connector.


Now inspect the solder joints for any dry joints and ensure the box is free of any solder splashes etc. I used a silicon grease spread around the lip of the box and lid before screwing the two together. In the past I have used a silicon sealant, the type used in the bathroom. If you use this type and it has the vinegar type smell, keep this away from and metal as it tends to promote corrosion.
In the next few days I hope to get up the ladder and fit the unit to my mast. I will take additional pictures and post these in the next week or so. Please ask any related question and I’ll try to assist. Further details including a kit of parts are available from the EARC website: http://www.earchi.org